Extended-Focus Imaging Using Auto-Montage System
Introduction
This section contains procedures for taking and creating extended-focusing images using an Auto-Montage imaging system. The procedures were initially described by Elijah Talamas.
Contents
Specimen Configuration / Initial Setup
Mount Specimen in Clay
Adjust the specimen in clay into the appropriate position for imaging. It is usually necessary to do this under a microscope.
Place Specimen onto Stage
Center the specimen directly beneath the camera lens and orient it by eye as best you can.
Orient Light Dome
Place light dome over the specimen. Be sure that the camera is sufficiently raised to avoid a collision between the light dome and the camera/lens. Also, be sure not to hit the specimen with the light dome or scratch the interior of the light dome with the end of the insect pin. Now, turn on the light dome
Fine-tune Specimen Orientation
Lower the camera/lens to bring the insect into focus. You may have to increase or decrease the exposure time to see the insect, particularly when it is out of focus. Make the final fine-tune adjustments to the orientation of the specimen. Fine movements along the stage are best achieved by the adjustment knobs in the back right corner of the imaging stage. To perform rotational movement, firmly and slowly rotate the stage by holding onto it on opposite ends.
Adjust Light Settings
Adjust the light settings (see Lighting).
Imaging
Use either one of the two imaging approaches as defined below.
Taking Individual Images (Stack) Manually
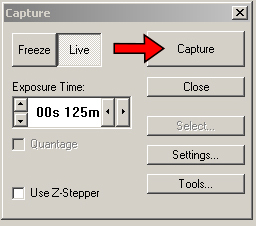
Using either the coarse or fine adjustment setting (depending on magnification), find the highest point of the specimen that you want to be in focus in your final product. Now begin to image by taking photographs incrementally (press Capture to take the photograph under the fine adjustment setting. Watch closely at a point that is in focus as you move the camera; just as it becomes out of focus and a point below or above it begins to come into focus is when you should take the photo. It is helpful to follow the area of focus along a continuous surface, like an antenna, wing, or leg, as you move through the depth of the specimen. Your last photograph will be at the lowest point of the specimen that you desire to be in focus in your final product. This process requires experience to master.
Taking Individual Images (Stack) with Z-Stepper
Note: Z-stepper on the OSUC Auto-Montage machine is inoperable!
Extended-Focus Image Processing
Using Auto-Montage Software
Create Extended-Focus Image
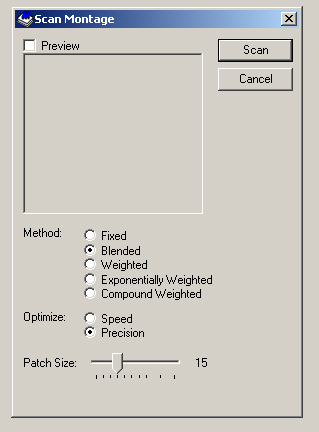
Load the source images, they will automatically be loaded if you just took them. Press the blue M icon to begin the montage process. You will now see an option to select the type of algorithm and the spot size. The algorithm is typically set to Blended. A small spot size will often produce a better image, yet will require extensive cleanup. A large spot size typically reduces the need for cleanup but also reduces detail in the final image. If you are a beginner, use 15 for the spot size, and change it as you see fit for different specimens, experimentation, etc. Now, press the Scan button and wait for the program to combine the images.
Image Clean Up
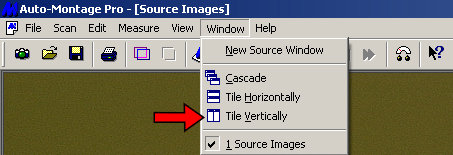
Select Tile Vertically from the Window menu.
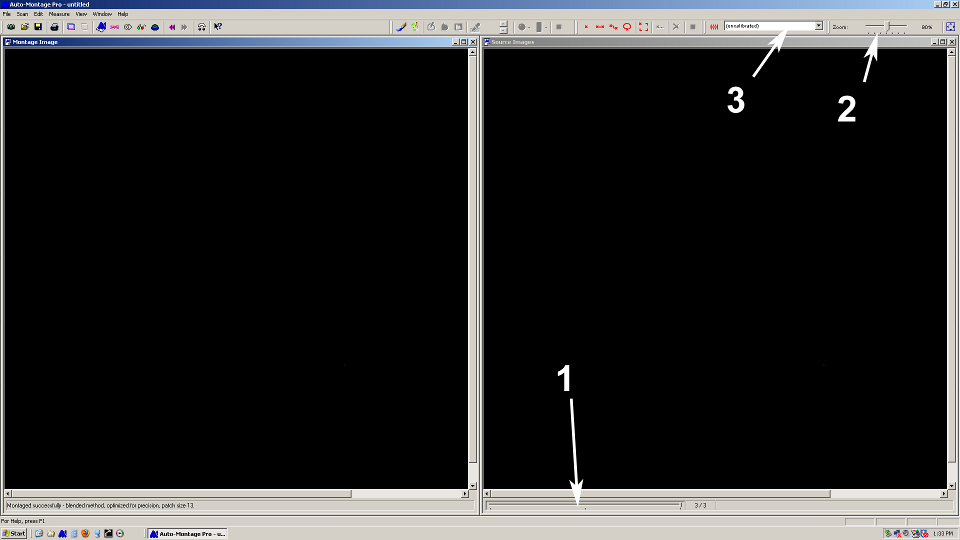
From here you may select from one of the source images to clean up the montage image if necessary (refer to the image below for number references). This may be done in two ways:
- Using the paint brush tool (#1), this is best for small areas. 3 sizes are available (#7).
- Using the area selection tool, this is best for large areas (#2 and #3). You may select either the interior (#4) or exterior (#5) of the area to be replaced by the source image.
To select the source image that will be used to replace the corresponding area on the montage image, first scroll through the source images until you find which one is the best. You can do this easily be clicking on the lower right corner (#1 below) and using the mouse wheel to scroll up and down through the images. If you now click the paint brush or area selection tool, then the source image you see is the one selected. If not, or if you have clicked elsewhere, you may select the image using the eyedropper tool (#6 above). It does not matter if you use the tools on the source image or the montage image during cleanup- the result is the same. It may help to increase or decrease the zoom. This can be adjusted by the sliding bar in the upper right hand corner (#2 below).
Applying Scalebar / Measuring
Now that you have cleaned up the image, select the appropriate magnification to calibrate the image (#3 above). A scalebar will appear on the image. It is best to move this to a place where it does not overlap the specimen so that it may be easily removed in Photoshop for publication. Placing the mouse cursor over the scalebar will transform it into a hand tool for moving.
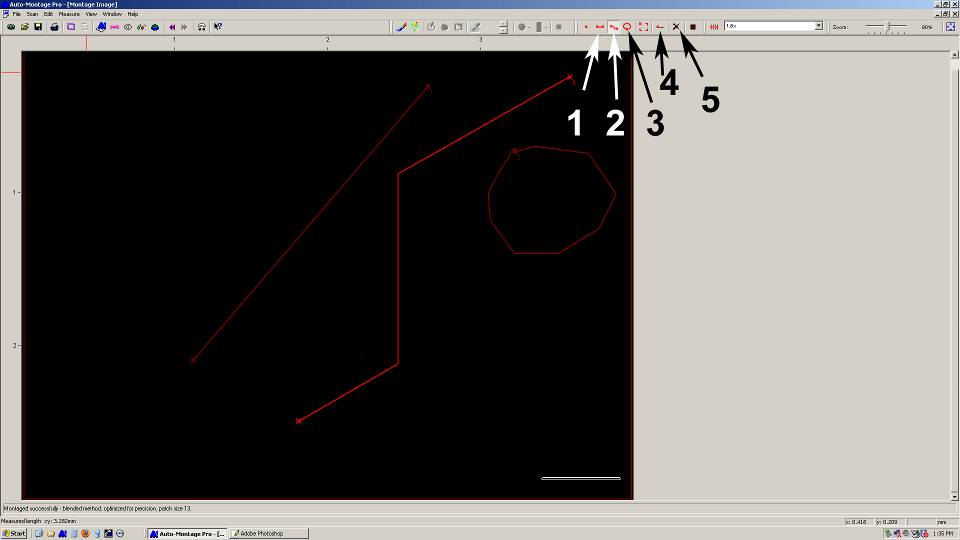
Now that the montage image is properly calibrated, you can measure anything you wish using the straight line ruler (#1 below), zig-zag line ruler (#2 below), or lasso ruler (#3 below). Press the Measurement Details button (#4 below) to see the results, and delete measurement lines with the delete button (#5 below).
Save Image
Save the montage image and montage file (.m extension) if you will need to do measurements in the future. Save the source images if you think you will need to do clean up in the future, or if you need them for another purpose. Typically, these are deleted once you produce a satisfactory montage image. Export the montage image, with scalebar, as a TIF file.
Specimage Upload
Upload the image into Specimage immediately. Record the label data immediately and send this information to Joe Cora.
Using Combine ZP Software
Create Extended-Focus Image
Start the program. Click New. Select all of the appropriate source images and click Open. Select Do Stack from the main menu and press Go. Wait for the extended-focus processing to complete.
Save Image without Scalebar
Click the button showing a rectangular dotted line. You will then see a dotted line surround the image. Save as either a JPG or a TIF file. To add a scale bar you will need to open the image file in Automontage- it is a good idea to record the magnification setting of the lens in the filename so that you do not make mistakes, i.e. filename= lateralhead_1-25.jpg, where the magnification setting of the camera is at 1.25.
Applying Scalebar in Auto-Montage
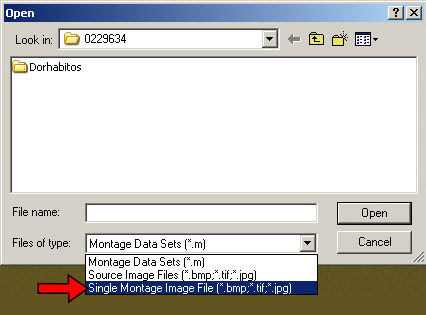
If you saved the image as a JPG, then open it in Automontage by selecting single montage image. If you saved as a TIF then you will have to open it in Photoshop and resave it without alpha channels in order for it to open properly in Automontage. Once you have opened the file in Automontage, calibrate the image appropriately. Once the image is properly calibrated, apply the scalebar as described above (see Applying Scalebar / Measuring) and follow the additional steps (see Save Image and Specimage Upload).
Lighting
Adjust Brightness
You can adjust the brightness while taking images in 3 ways.
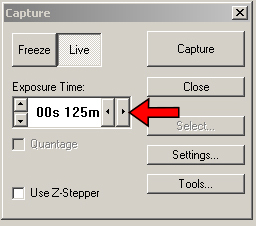
- Increase or decrease the exposure time of the camera.
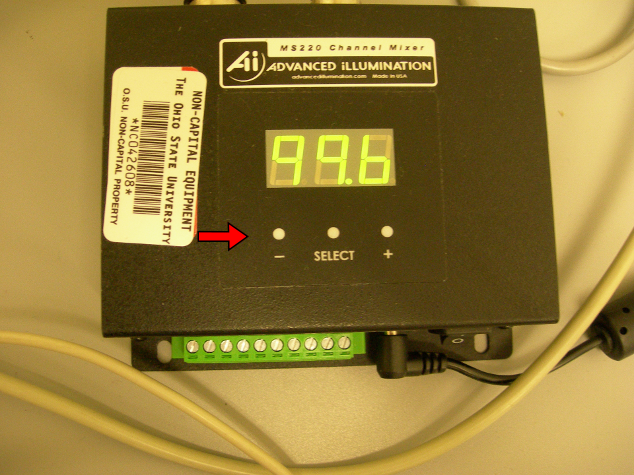
- Increase or decrease the light intensity in the light dome.
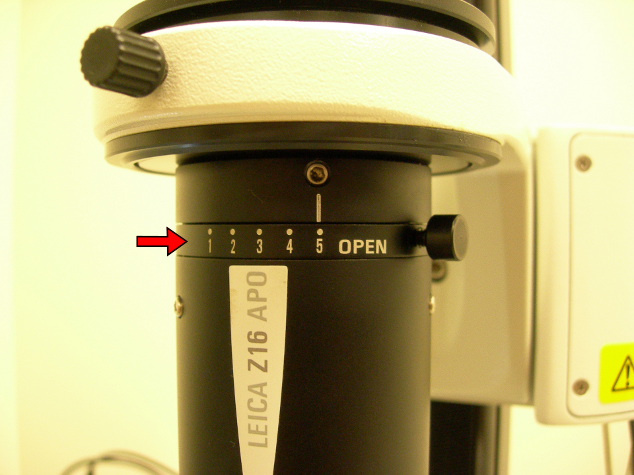
- Increase or decrease the size of the lens aperture.
Adjust Color Scheme
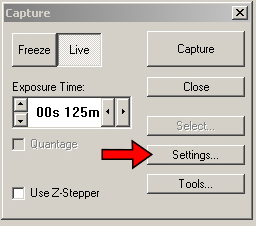
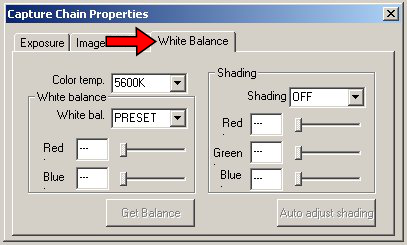
You can adjust the color scheme while taking images in three ways by selecting Settings from the Capture window
- White balance: this can be set manually, automatically, or you can use Preset settings: 3200K for yellower light, such as halogen light sources, or 5600K for bluer light, such as the light dome. The PRESET setting must be selected for these to work properly. Preset settings are recommended.
- Image Settings:
- Alter the gamma levels. This will change the relative brightness of shadows.
- Alter the Master Black: If this level is set too low, the entire image will appear darker than it should (the image will appear blackish and heavier). If the level is set too high on the other hand, the image will look lighter than it should (the image will look foggy with less contrast).
