OCR PDF with ABBYY
Introduction
This section contains instruction on how to OCR text from a PDF in Abbey FineReader 9.0. In order to be accurately OCR'd, the resolution of the PDF should be at 600 dpi. Abbey provides an interface to verify the interpreted text against the original PDF scan. The scanning computer is the only machine that has the Abbey software installed.
Open PDF
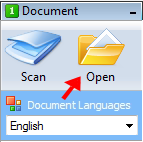
Start Abbey, then click the "Open" button under the "1 Document" heading. Navigate to the PDF you wish to OCR, and select. The first stage of the OCR process within Abbey is to analyze the document. Analysis will identify the various elements within the PDF like inline, tables, figures, and headers. Make sure to change "Document Languages" to the proper value(s).
OCR Text
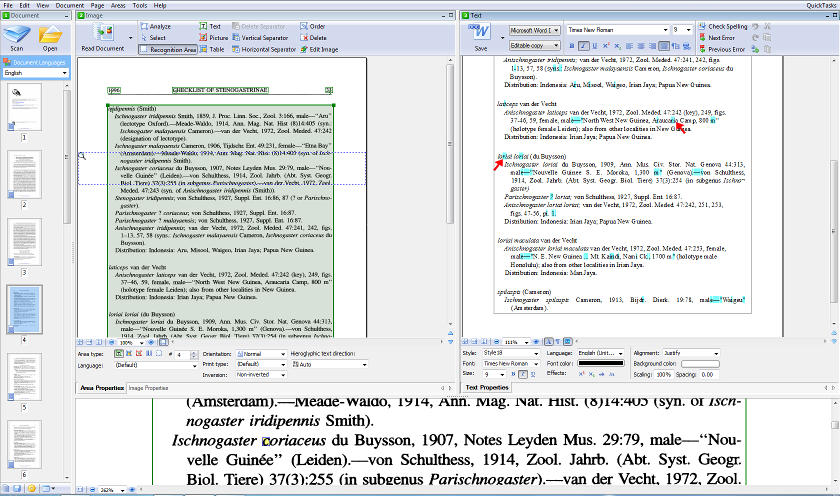
After the document has been loaded and analyzed, the text will need to be OCR'd, or "Read" as is the vernacular within Abbey. Under the "2 Image" heading, press the "Read Document" button to initialize the OCRing process. This may take some time for large documents.
Correct OCR Errors
Although Abbey is fairly accurate at OCRing, it still occasionally makes mistakes. Abbey is also handy enough to direct you towards certain text elements that it believes may be problematic. The potentially problematic text are highlighted in light blue (see image), but your primary focus should be on the correct spelling of taxon names, which are usually italicized, and their authors. The magnifying glass block in the left PDF pane is what is represented in the magnified area in the bottom pane with the OCR'd text shown in the right pane.
Be aware that a common OCR mistake by Abbey is the misinterpretation of the letters "rn" as the letter "m".
Saving PDF with OCR'd Text
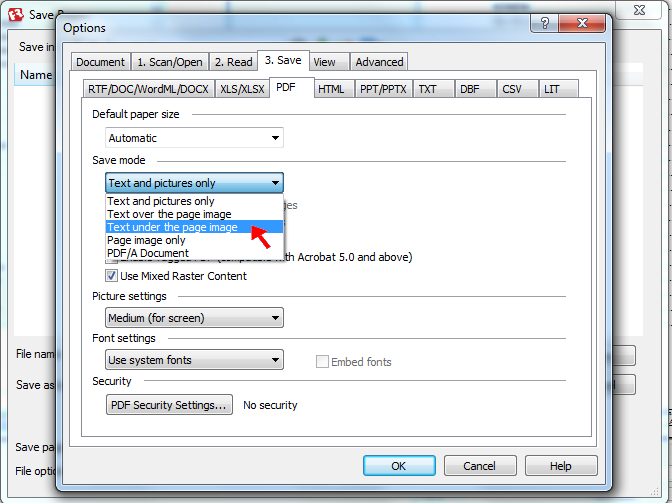
Finally, the PDF must be saved with the newly OCR'd text included. Click the "Save" button under the "3 Text" heading, but make sure that the document is being saved as a "PDF Document" as an "Exact copy". If the "Exact copy" option is not available, a page may not have been read that will require a re-reading of that page. After clicking the "Save" button, a save dialog box will pop up with the location of the file to be saved. Before clicking the "Save" button, make sure that "All pages" is selected at the bottom of the dialog. Also, click "Options" at the bottom of the dialog, click on the "3.Save" tab then "PDF" tab, and make sure that "Save mode" is set to "Text under the page image". After all of the settings have been verified, save the PDF document for use.


